

![[FLASK]back to the past: Building an application with our friend "flask" and API](https://cdn.hashnode.com/res/hashnode/image/upload/v1711307602987/8f7b6f1d-4212-49de-a420-c00ed54d781a.png?w=1600&h=840&fit=crop&crop=entropy&auto=compress,format&format=webp)


Table of contents
Flask is a friendly lightweight Python framework for creating fast websites. It is a highly customizable and beginner-friendly framework to start with. And you can create APIs very smoothly 🤩

So what is an API? API stands for Application Programming Interface, which acts as a middleman between different applications.

In simple words, API is like a vending machine, we put in coins (make requests from API), and it gives a drink 🧋(data we requested), without even knowing the mechanism of how the machinery works, we are happy with the request we made and satisfied with the result.
This concept is enough to get started. So let's dive in . . . 🙃
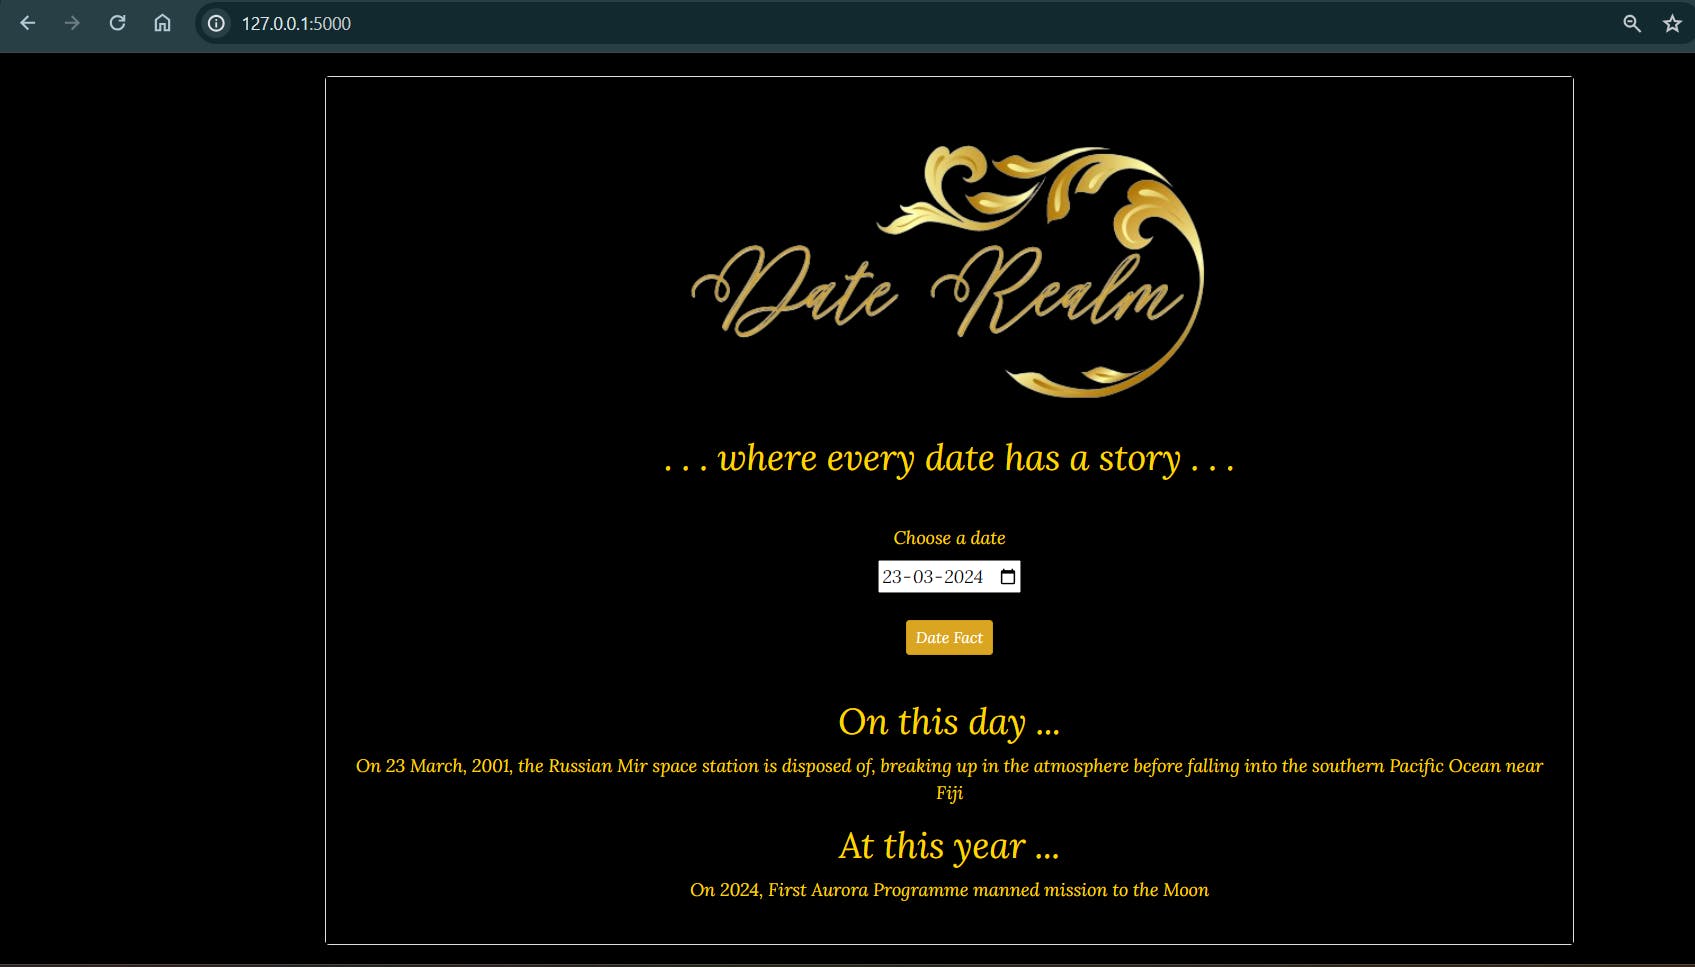
Glimpse of what we will be building
A Flask-based application integrated with a numbers API, where we will select a date from the calendar, and pass it to API in the required format to peek at what has happened on that day and year in the past.
Initial Preparation
Create a virtual environment for this project. You can use
pipenvorcondafor creating the env and installing the below packages.The package requirements will be ...
flask=2.2.5
python=3.12.2
python-dotenv=1.0.1
requests=2.31.0
You need to sign in to
Rapid-API, it is free and the API we will be using is free, so no worries out there 😇. Link to the numbers API: Numbers API Documentation (divad12) | RapidAPI as signing up will give you an API key.The Date realm logo: [ Made using CANVA ]

Functionally creating main.py
1) Importing necessary packages and starter code
from flask import Flask, render_template, request, redirect, url_for
from dotenv import load_dotenv
import datetime
import requests
import calendar
import os

load_dotenv()
rapid_api_key = os.getenv("RAPID_API_KEY")

app = Flask(__name__)
dotenvlets us store our variables as environment variables, preventing the need for hardcoding sensitive information such as an API key. It is one of the standard ways of handling it. For that create a.envfile, and inside it,
RAPID_API_KEY = "Your_API_Key" # place your api key here
On the page of the numbers API, at the "endpoints testing" part, or in the code beside it, you can get your API key for that API, under the name "X-RapidAPI-Key".
2) Working for API request calls
def request_to_numbersAPI(day, month, year):
    date_url = f"https://numbersapi.p.rapidapi.com/{month}/{day}/date"
    year_url = f"https://numbersapi.p.rapidapi.com/{year}/year"
    querystring = {"fragment":"true", "json":"true"}
    headers = {
        "X-RapidAPI-Key": rapid_api_key,
        "X-RapidAPI-Host": "numbersapi.p.rapidapi.com"
    }
    response = {}
    response['response_date'] = requests.get(date_url, headers=headers, params=querystring).json()
    response['response_year'] = requests.get(year_url, headers=headers, params=querystring).json()
    return response
These date URLs and year URLs are the endpoints of date and year respectively.
(Taken from request code provided by the API)
Breakdown of the function ...
a) URLs: We will pass the arguments day, month, and year. This will serve as an endpoint for our request.
date_url = f"https://numbersapi.p.rapidapi.com/{month}/{day}/date"
year_url = f"https://numbersapi.p.rapidapi.com/{year}/year"
b) Parameters 'n Headers: We pass in parameters fragment and json . Turning fragment='True' to return event fact as a sentence fragment (first letter small and no ending punctuation. It is optional too.
json='True' is to return the response as JSON instead of plaintext.
Headers are additional information sent along with the request for authentication purposes generally.
querystring = {"fragment":"true", "json":"true"}
headers = {
    "X-RapidAPI-Key": rapid_api_key,
    "X-RapidAPI-Host": "numbersapi.p.rapidapi.com"
}
c) making [get] requests:
requests.get(url, headers, params) returns a response data type, <Response [200]> is a sun ray for us, it means that our request is successful.
requests.get(url, headers, params).json() will convert the response to JSON, essentially to the data we requested.
If our request is successful, we will receive the JSON in this format:
// let's say we made request using date_url
{
'text': FACT, // The fact that happened on that day in past
'year': YEAR, //any random year
'number': NUMBER, // The number of day we gave, starting as 1 from 1 JAN
'found': True, // If any fact on that day found, True returned else False
'type': 'date'
}
response = {}
response['response_date'] = requests.get(date_url, headers=headers, params=querystring).json()
response['response_year'] = requests.get(year_url, headers=headers, params=querystring).json()
return response
We stored the JSON in a dict response and returned it.
Whew!! That was quite a lot, but we are now done with fetching the data using API. Now moving on to further steps, where we will be displaying this retrieved data on a web server using Flask.
3) Our HOME page
If we use the get (default) method for our HTML forms, then the URL will include the info of the request, like http://127.0.0.1:5000/?date=2024-03-18
@app.route('/')
def home():
    todays_date = datetime.date.today()
    current_date = datetime.date.today()
    day, month, year = 0, 0, 0
    response = {}
    if request.method == 'GET':
        date = todays_date.strftime("%Y-%m-%d")
        year, month, day = date.split('-')[0], date.split('-')[1], date.split('-')[-1]
        response = request_to_numbersAPI(day, month, year)
        current_date = date
    return render_template('home.html',
                            todays_date=todays_date,
                               current_date=current_date,
                            response=response,
                            day=day, month=calendar.month_name[int(month)], year=year)

# in html
<form action="/">
    <label for="date">Choose a date</label>
    <br>
    <input type="date" name="date" value="{{current_date}}" min="0000-00-00" max="{{todays_date}}" />
    <br>
    <br>
    <button class="btn btn-primary btn-sm btn-gold" type="submit">Date Fact</button>
</form>
So, we use a post request instead that hides that info in the URL, rather we work with the URL in the backend where the URL will not contain query-related stuff!!
So the modifications will be like
@app.route('/', methods=['GET', 'POST'])
def home():
    todays_date = datetime.date.today()
    current_date = datetime.date.today()
    day, month, year = 0, 0, 0
    response = {}
    if request.method == 'POST':
        date = request.form['date']
        year, month, day = date.split('-')[0], date.split('-')[1], date.split('-')[-1]
        response = request_to_numbersAPI(day, month, year)
        current_date = date
    return render_template('home.html',
                            todays_date=todays_date,
                               current_date=current_date,
                            response=response,
                            day=day, month=calendar.month_name[int(month)], year=year)

# and the html form
<form action="/" method="post">
   <label for="date">Choose a date</label>
   <br>
   <input type="date" name="date" value="{{current_date}}" min="0000-00-00" max="{{todays_date}}" />
   <br>
   <br>
   <button class="btn btn-primary btn-sm btn-gold" type="submit">Date Fact</button>
</form>
Now these code breakdowns,
a) initialization: getting today's date. So whenever we open the application, the pre-selected value in the calendar will be of that day. And current_date will be set to our query date each time we make the request.
todays_date = datetime.date.today()
current_date = datetime.date.today()
day, month, year = 0, 0, 0
response = {}
b) post method and returning a rendered HTML page: When the request is a POST request, then we fetch the date from the request query, and send the data obtained for the day, month, and year to numbers API, to get facts for that day and year.
Then we render the home.html and return it as a response along with some data to HTML which we will access there using Jinja, in simple words including logic in HTML (Sounds cool right!).
if request.method == 'POST':
   date = request.form['date']
   year, month, day = date.split('-')[0], date.split('-')[1], date.split('-')[-1]
   response = request_to_numbersAPI(day, month, year)
   current_date = date
return render_template('home.html',
                            todays_date=todays_date,
                               current_date=current_date,
                            response=response,
                            day=day, month=calendar.month_name[int(month)], year=year)
c) Form for request: Using a post method, the fun part is Jinja, using the value of a variable, a for loop, or an if-else conditional, Jinga has everything covered!
{{ }}: {{ variable name passed in render_template(.html) }} acts as value of that variable
{% for item in iterable %}
{% endfor %}
{% if variable %}
{% else %}
{% endif %}
<form action="/" method="post">
   <label for="date">Choose a date</label>
   <br>
   <input type="date" name="date" value="{{current_date}}" min="0000-00-00" max="{{todays_date}}" />
   <br>
   <br>
   <button class="btn btn-primary btn-sm btn-gold" type="submit">Date Fact</button>
</form>
d) Displaying the retrieved data in HTML:
{% if response %}
          {% if response['response_date'] %}
            <h2> On this day ... </h2>
            {% if response['response_date']['found'] %}
              <p>
                On {{day}} {{month}}, {{response['response_date']['year']}},
                {{response['response_date']['text']}}
              </p>
            {% else %}
              <p> Sorry, we couldnt find any fact/event for date {{day}} {{month}} </p>
            {% endif %}
          {% endif %}

          {% if response['response_year'] %}
            <h2> At this year ... </h2>
            {% if response['response_year']['found'] %}
              <p>
                On {{year}},
                {{response['response_year']['text']}}
              </p>
            {% else %}
              <p> Sorry, we couldnt find any fact/event for year {{year}} </p>
            {% endif %}
          {% endif %}
{% endif %}
The result looks something like this:
On this day ...
On 25 March, 1655, Saturn's largest moon, Titan, is discovered by Christiaan Huygens
At this year ...
On 2024, First Aurora Programme manned mission to the Moon
4) THE WHOLE main.py
Yes, we are done with the logic part of requesting and retrieving the data and displaying it, let me share what the whole code looks like, and then we will visit the styling for it to have a fancy look for it!!
# main.py
from flask import Flask, render_template, request, redirect, url_for
from dotenv import load_dotenv
import datetime
import requests
import calendar
import os

load_dotenv()
rapid_api_key = os.getenv("RAPID_API_KEY")

app = Flask(__name__)


def request_to_numbersAPI(day, month, year):
    date_url = f"https://numbersapi.p.rapidapi.com/{month}/{day}/date"
    year_url = f"https://numbersapi.p.rapidapi.com/{year}/year"
    querystring = {"fragment":"true", "json":"true"}
    headers = {
        "X-RapidAPI-Key": rapid_api_key,
        "X-RapidAPI-Host": "numbersapi.p.rapidapi.com"
    }
    response = {}
    response['response_date'] = requests.get(date_url, headers=headers, params=querystring).json()
    response['response_year'] = requests.get(year_url, headers=headers, params=querystring).json()
    return response


@app.route('/', methods=['GET', 'POST'])
def home():
    todays_date = datetime.date.today()
    current_date = datetime.date.today()
    day, month, year = 0, 0, 0
    response = {}
    if request.method == 'POST':
        date = request.form['date']
        year, month, day = date.split('-')[0], date.split('-')[1], date.split('-')[-1]
        response = request_to_numbersAPI(day, month, year)
        current_date = date
    return render_template('home.html',
                            todays_date=todays_date,
                               current_date=current_date,
                            response=response,
                            day=day, month=calendar.month_name[int(month)], year=year)
Cool! We are done with the logical part and now let's stylize it with bootstrap.
5) bootstrapped home.html
{% extends 'base.html' %}

{% block title %}Date Realm{% endblock %}

{% block main %}

<div class="container">
  <div class="card-deck mb-3">
    <div class="card mb-4 shadow-sm">
      <div class="card-body text-center card-body">
        <img class="d-block mx-auto img-fluid" style="max-width: 75vw; max-height: 40vh;" src="{{ url_for('static', filename='logo.png') }}">
        <h2 class="my-0 font-weight-normal text-center">
          . . . where every date has a story . . .
        </h2>
      </div>
      <div class="card-body text-center">
        <form action="/" method="post">
          <label for="date">Choose a date</label>
          <br>
          <input type="date" name="date" value="{{current_date}}" min="0000-00-00" max="{{todays_date}}" />
          <br>
          <br>
          <button class="btn btn-primary btn-sm btn-gold" type="submit">Date Fact</button>
        </form>
      </div>
      <div class="card-body text-center">
        {% if response %}
          {% if response['response_date'] %}
            <h2> On this day ... </h2>
            {% if response['response_date']['found'] %}
              <p>
                On {{day}} {{month}}, {{response['response_date']['year']}},
                {{response['response_date']['text']}}
              </p>
            {% else %}
              <p> Sorry, we couldn't find any fact/event for date {{day}} {{month}} </p>
            {% endif %}
          {% endif %}
          {% if response['response_year'] %}
            <h2> At this year ... </h2>
            {% if response['response_year']['found'] %}
              <p>
                On {{year}},
                {{response['response_year']['text']}}
              </p>
            {% else %}
              <p> Sorry, we couldn't find any fact/event for year {{year}} </p>
            {% endif %}
          {% endif %}
        {% endif %}
      </div>
    </div>
  </div>
</div>

{% endblock %}
where our base.html looks like:
<!doctype html>
<html lang="en">
<head>
  <!-- Required meta tags -->
  <meta charset="utf-8">
  <meta name="viewport" content="width=device-width, initial-scale=1, shrink-to-fit=no">

  <!-- Bootstrap CSS -->
  <link rel="stylesheet" href="{{ url_for('static', filename='bootstrap.min.css') }}">
  <link rel="stylesheet" href="{{url_for('static', filename='style.css')}}">

  <!-- Font Style -->
  <link rel="preconnect" href="https://fonts.googleapis.com">
  <link rel="preconnect" href="https://fonts.gstatic.com" crossorigin>
  <link href="https://fonts.googleapis.com/css2?family=Lora:ital@1&display=swap" rel="stylesheet">

  <title>{% block title %}{% endblock %}</title>
</head>
<body>

  <div class="p-2 px-md-4 mb-3 bg-black">
<!-- To have some space at the top -->
  </div>

  {% block main %}{% endblock %}

</body>
</html>
6) Finishing note
If you made yourself follow till here, pat yourself, we are done with the application and with a beautiful yet simple Flask application integrated with an API, running on our servers!!

Takeaway: Explore and learn more, start by building small, and keep on scaling up, combining different techs in Python, and keep creating wonders!
The full code can be found at: https://github.com/nidhi2026/DateRealm